January 21, 2012

Ginger Pear Blueberry Bread

It turns out I have a bunch of canned fruit. And I don't necessarily enjoy popping open a can and going at it. So, I've been trying to find ways to use the fruit. Here's one of the ways that's turned out darn good:

Ginger Pear Blueberry Bread

3 eggs
2 C sugar
2 tsp vanilla
1 C vegetable oil
3 C flour
1 tsp baking powder
1 tsp salt
1 tsp baking soda
1 tsp ground ginger
1/2 tsp ground nutmeg
1 tsp lemon zest/peel
1 1/2 C diced pears, drained
1 C blueberries

Preheat oven to 350
Grease and flour bread pans (this recipe makes the equivalent of 2 8x4 inch loaves).
Beat together all wet ingredients.
Add in dry ingredients until combined.
Fold in pears and blueberries.
Pour or scoop batter into prepared pans.
Bake at 350 until a tester inserted in the middle comes out clean.

Note: For 8x4 loaves it's about an hour. For mini loaves I tend to get it done in just under 35 minutes. Muffins take 18-25.

January 2, 2012

Noon Year's Eve Party

My boys go to bed relatively early, regardless of what day the calendar says it is. Yet it's important to me to celebrate holidays with them. Which means New Year's Eve presents a problem for me. I don't even want to stay up until midnight, and there's no way I'm going to entertain my grumpy, tired children way past their bedtime. So, I came up with Noon Year's Eve. And when I say I came up with it, I mean 6 days until the new year I decided to go all out and throw a party. With a little more planning, some things would have been done differently. I'll explain those as I go along.

The invitations - a confetti cannon. Blog post all about that can be found here.
The decorations:
The New Year's banner at the top of the post. Ideally I'd have modified it so it said Noon Year. But on 6 days (three of which I had to work), it was good enough straight out of the package.

I chose paper lanterns (unlit) to hang above the food area. I used 3M's Command Adhesive and hooks to hang up the lanterns (strung with fishing line). The color scheme was multicolored, is I have two multi-colored ones and a bright green lantern, all from Cost Plus World Market.

I covered my island with a tablecloth cut to fit the odd shape. It kept the countertop clean and kept anyone from noticing the flaws in my laminate counters.

The dining and craft area was pretty simple. Above the table I hung foil spiral stars (3 pack for each color, available at Walmart).

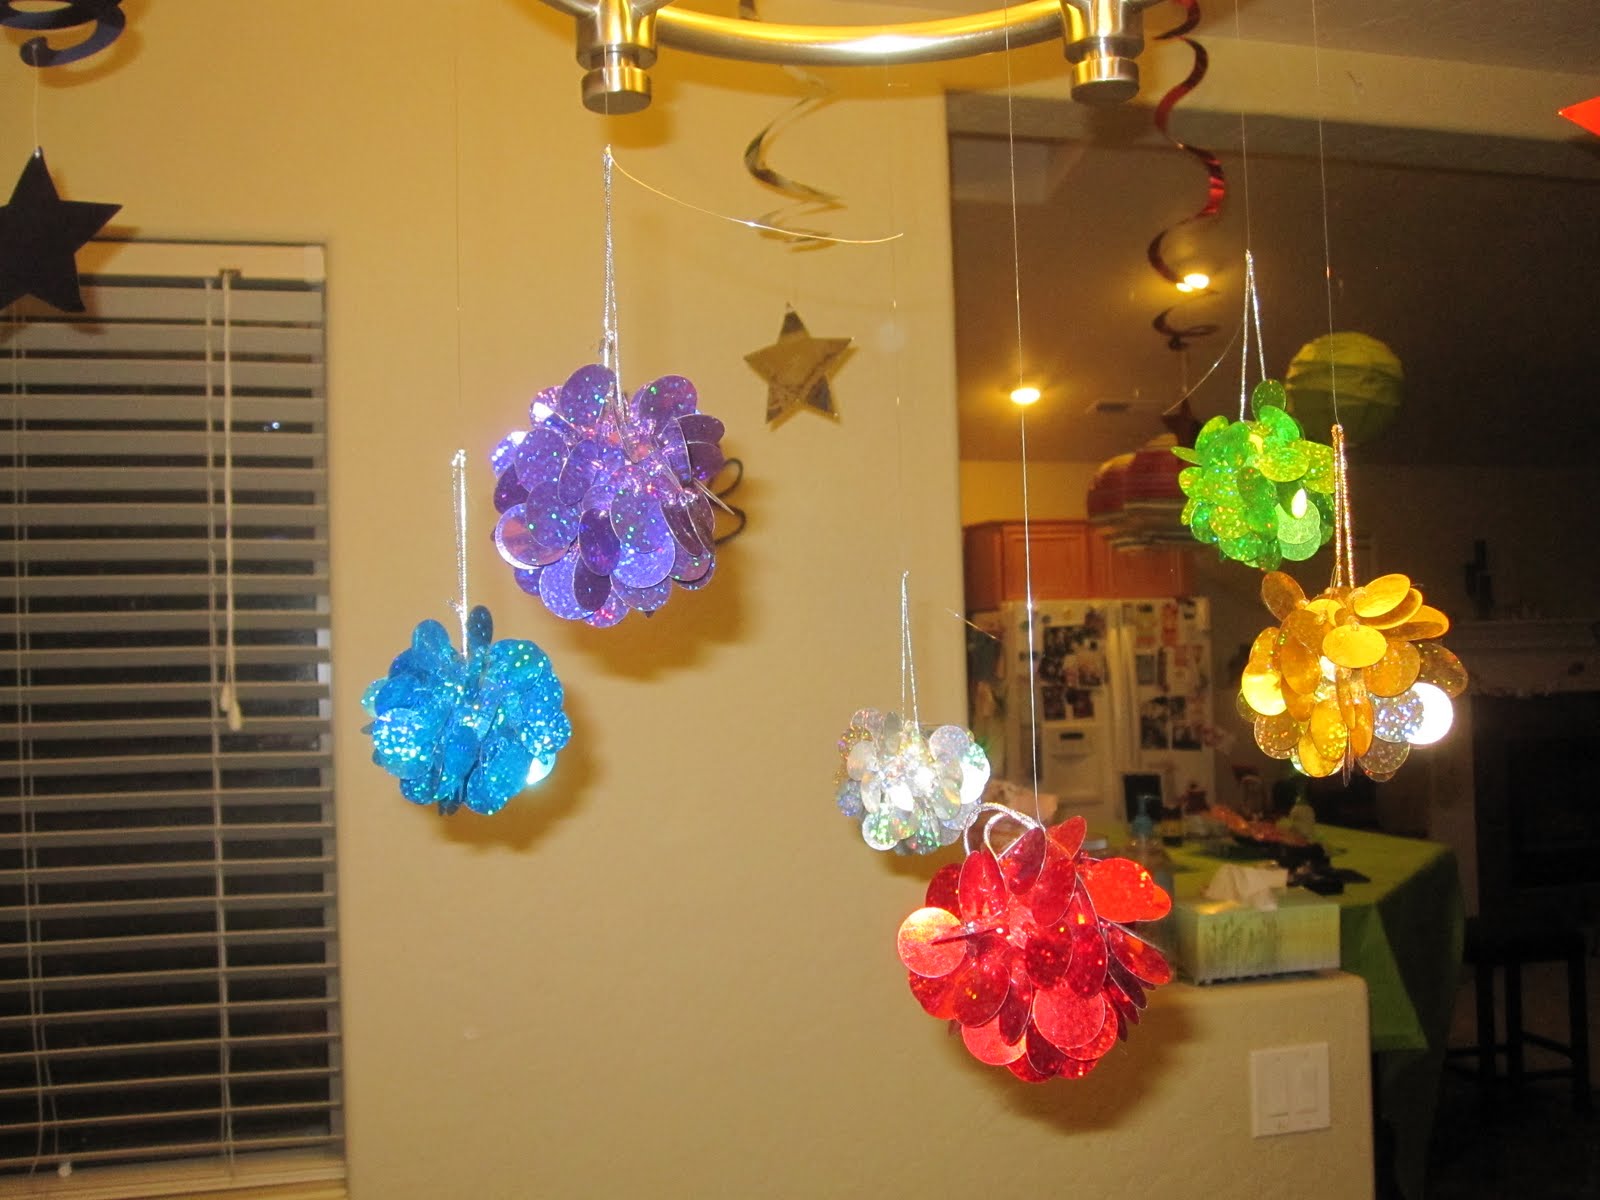
From the light fixture I hung some sparkly balls. These I bought from Cost Plus in an after Christmas clearance sell. If I had to make them I'd get some sequins and foam balls from a craft store and just go at it.
The centerpiece was a cheap flowerpot and flower foam. I stuck after Christmas clearance sparkly things into the foam, and then covered the foam with multi-colored foil-covered candies. Easy peasy.

Crafts: Around the centerpiece above you'll see a collection of picture frame sets. They're little printed frames with markers. I found them in the $1 aisle at my local craft store. I was actually looking for foam frames and foam stickers.
I also had available a large bowl of random plastic beads and some elastic cord for do it yourself kid jewelry.

For party favors I went simple. A multipack of kid's star-shaped sun glasses (15 for $5.99 at my local party supply store) and some glow in the dark bracelets ($1 for 15 at my local craft store).
For the countdown, I also provided an assortment of New Year's party hats. If I'd had more time, I'd have made my own hats that said Noon Years.

Food (sorry for the bad pics):
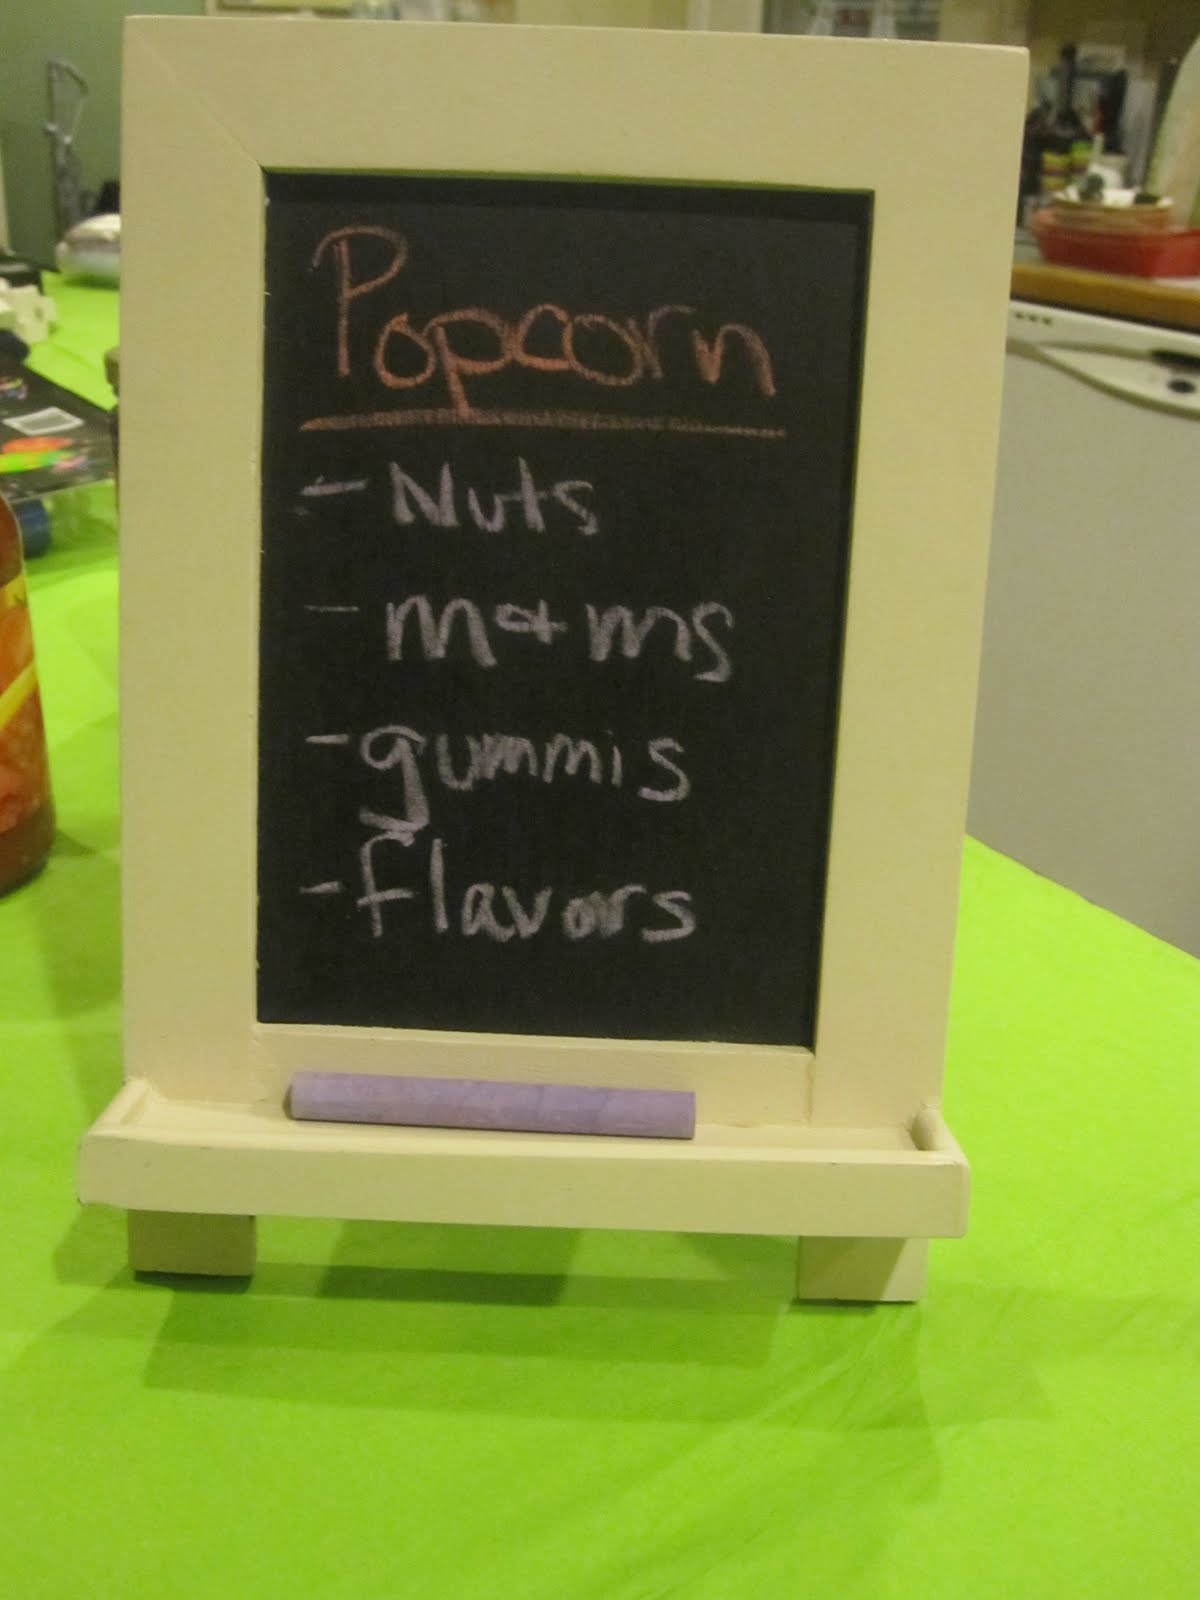
I found some cute framed chalk boards at Cost Plus World Market. I used these to provide the menu to guests.
Lunch was a nacho bar. I had nacho cheese in one crockpot and chili in another, I also provided chips (I used some red/green Christmas ones, mixed with some yellow and blue tortilla chips), sour cream, jalapenos and salsa. Nachos could be dished up in standard nacho dishes (the red and white kind found at football games. You know the type.) The nacho bowls were easy to get at my local craft store. I provided smaller animal face bowls from Walmart. They were easy to find in the paper goods aisle.
Dessert was a popcorn bar. I used pre-popped popcorn in popcorn boxes (craft store.) I had set out different popcorn flavorings (cheese, caramel, butter, and cinnamon sugar), along with lots of yummy mix-ins (mini Oreos, mixed nuts, mini M&Ms, and gummi bears) The kids loved being able to choose their own mix-ins.
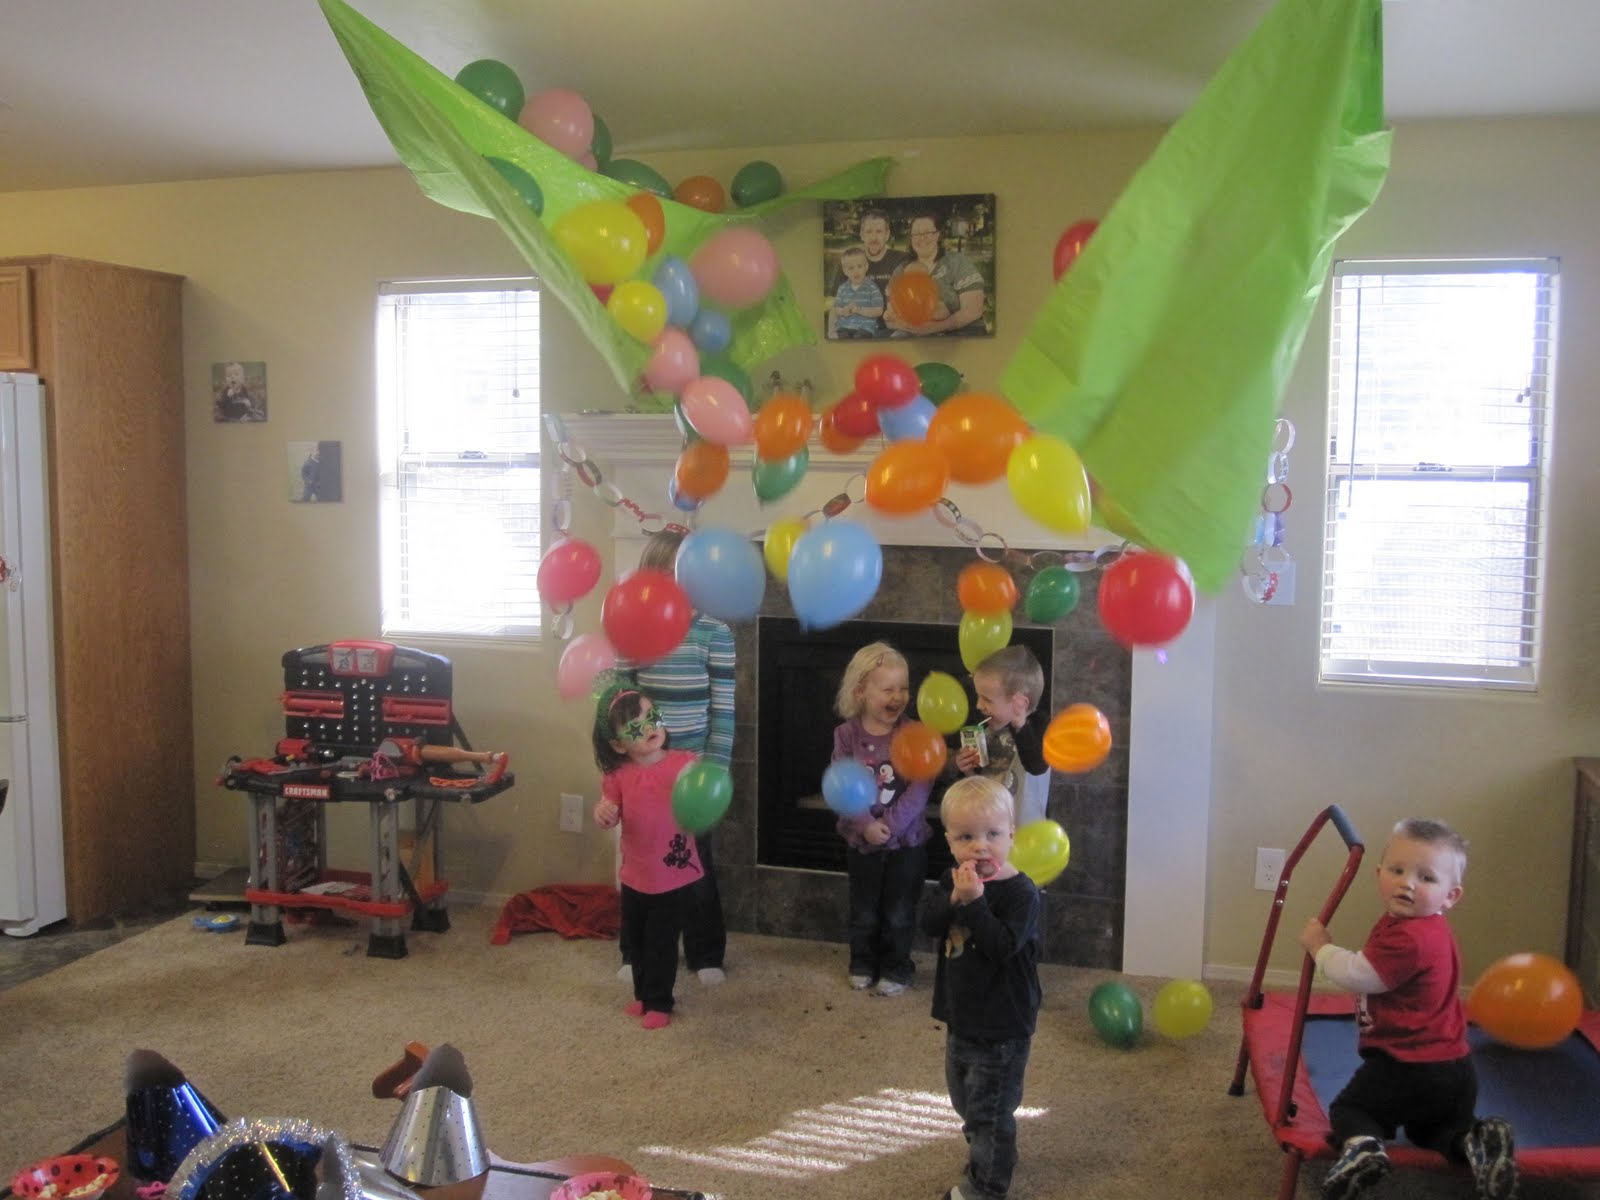
We counted down to Noon, and then had a balloon drop (Instructions here.)The kids had a blast playing with the balloons for at least a half hour.

And that, my readers, is how the Moose household celebrated Noon Year's Eve.
The party was a success, was easy to set up, and even easier to clean up (aside from the 91ish balloon still scattered in my livingroom). We started at 10:30AM and said goodbye to our last guests around 1pm. It was short, sweet, and - most importantly - perfect for getting everyone to bed on time. We'll be doing it again next year - maybe a black and white theme for 2012...

DIY Balloon Drop

For the Noon Year's Eve party I wanted something big to happen at Noon. And what kid doesn't love a gazillion balloons?! So a balloon drop it is.

I used a standard paper tablecloth - the kind with a plastic backing, a piece of yearn about 10' long, a hole puncher, 91 balloons, and some confetti.

Step 1: Cut tablecloth in half to create two almost squares.

Step 2: Along the cut edge of each half, punch holes, approx 1" apart.

Step 3: Thread yarn through holes, creating a "zipper" through the middle of the tablecloth, making sure to leave most of the yarn hanging from one side (this will become the ripcord when it's time for the drop).
Step 4: Hang the tablecloth from the ceiling. Duct tape works perfectly for this. We used command adhesive and some plastic hooks. Just make sure you hang it so there's some slack in the tablecloth. That's where you'll put the balloons.

Step 5: Blow up balloons until your lungs hurt and your fingers are raw from tying the darn things. I used 91 balloons - a mixture of 7" and 9".

Step 6: Place balloons in tablecloth.

Step 7: Throw confetti on top of balloons.
When it's time for the balloon drop, quickly pull the yarn ripcord. The balloons and confetti will drop. And the kids will love it (adults too!)


Silly Elfkins (Part 2)

The continuing saga of Elfkins, our Elf on the Shelf.
Again, some ideas are found from the pictures on Pinterest. Some are my own.

Elfkins didn't quite make it back inside before Toddler Moose woke up. Good thing he flies with his ear muffs and scarf on! Silly Elfkins.
Elfkins brought a new puzzle to play with. He even almost finished it by the morning. Silly Elfkins!
Elfkins hid out on a wall sculpture. This particular one is about 9 feet off the ground. Silly Elfkins.
Elfkins dusted our fan, but got caught up there when Toddler Moose woke up the next morning. Silly Elfkins!
Elfkins hid Toddler Moose's stocking and replaced it with one he made at preschool. Silly Elfkins!
Elfkins started building a snowman army out of Marshmallows, toothpicks and Sharpie Markers. Silly Elfkins!
Elfkins doesn't know the password to the iPad, so he had to go with the physical Angry Birds game. Silly Elfkins!
Toddler Moose woke one morning to find Elfkins in the midst of partying hard. He was caught with pretzels everywhere and even a few Hershey's Kisses. Silly Elfkins!
Elfkins used some glitter to make a snow angel. Silly Elfkins!
The night of my birthday, Elfkins found himself helping to hang my birthday sign. Silly Elfkins!

Not shown (the only picture I didn't get): Elfkins brought us a gingerbread train kit, and he even took the time to frosting-glue the pieces together. He must have known how impatient we are with that step in the process. Silly Elfkins!

I have it on good authority that Elfkins will likely stop in a few times throughout the year to check on the boys.

Crockpot Hawaiian Chicken

So, my bestie has often mentioned this meal in text messages. And with only four ingredients, I thought I'd give it a try. It was easy and made plenty to eat. She has a twist on the meal. I'll happily explain that later.

Crockpot Hawaiian Chicken
1 jar Hawaiian barbecue sauce (I used Target brand/Archer Farms)
1 can crushed pineapple
2-4 frozen chicken breasts
Rice

Place chicken breasts in crockpot (spray with oil if not using a liner)
Mix pineapple and barbecue sauce.
Pour over chicken.
Let cook on high 4-6 hours, or low 6-8 hours, or until chicken falls apart easily with tongs.
Serve over rice.

Mel's variation:
Serve on bun with coleslaw.

Enjoy!

Scooter Boards

My boys love anything with wheels. And if it's something they can do together - AND has wheels - it's golden in the Moose house.

So, we've made scooter boards. Pretty easy to make.

Scrap wood - approx 14" x 14"
4 casters
16 screws, no longer than the width of the scrap wood
sandpaper
Cut board to size. Square is ideal, but a perfect square just isn't necessary. We used an old scrap piece of laminate countertop. It's what we had handy.

Attach a caster in each corner using the screws.

Sand down any sharp/rough edges.

Have fun.
Moose Tracks:
You could paint or decoupage or decorate the heck out of this thing,. I would have if it weren't for the laminate countertop material.
My boys love to take turns sitting on the scooter and having the other push him around. It's a ton of fun.
Baby Moose (shown above) is wearing a helmet. It's not because helmets are necessary on these (although it's never a bad idea), but because he'd just gotten off a motorized vehicle that did require a helmet.
We often move the livingroom furniture around to create some sort of a racetrack or obstacle course. Then the boys each take a scooter board and race. It's perfect rainy day fun.

The Best Bread Ever

I've started 2012 by going to heaven. One bite of this bread and you'll grow wings and don the white gowns and everything. You'll hear imperial sounds and see shining lights that can only be from the maker Himself. Really. It's that good.

Friends, crafters, countrymen, I offer to you Reese's Peanut Butter Cup Banana Bread.

The recipe comes from this awesome blog. I didn't modify a thing. I see no rel need to. Those who know me know how rare it is for me to accept a recipe as written. This is a big deal.


Peanut Butter Cup Banana Bread


3 very ripe bananas, mashed

1/2 C peanut butter

1/4 C oil

1 egg

1/2 C sugar

1/4 C brown sugar

1 1/2 C flour

1/2 tsp baking soda

1 1/2 tsp baking powder

1/2 tsp salt

8.5 oz bag of Reese's Miniature Peanut Butter Cups


Preheat oven to 350*


Grease loaf pan(s) (choose whatever size you want. I uses mini loaf pans)

Whisk together flour, baking soda, baking powder, and salt. Set aside.

Stir together bananas, oil, peanut butter, and sugars.

Combine wet ingredients with dry ingredients. Stir until moist. The batter will be lumpy.

Fold in Reese's Miniature Peanut Butter Cups.

Pour into prepared pan(s).

Bake at 350*. 8x4 pans will bake for approx an hour. Smaller pans will bake less time. The mini loaf pans I used baked for 35-45 minutes.

Let cool in pan for 10 min. Then remove from pan and let cool, if you can.


Do you see how awesome this bread is? Have you gained five lbs just looking at it? Wait until you taste it. Your life will be changed forever.


Moose Tracks:

I used almost the whole bag of mini pb cups. In fact, I used all but one. because somebody has to do quality control.

I prefer mini loaves to one large loaf. For many reasons. 1) They cook faster 2) They tend to brown evenly without the edges getting burnt and 3) I feel much less guilt when I admit to having eaten a whole loaf.

If I were to make any changes to this recipe, it'd probably be to coarsely chop the pb cups before folding them into the batter.

December 29, 2011

Big Yay Paper Chain Company

Quite often I find I have friends in far away places counting down to something exciting. And I want to help them celebrate. So I developed my own paper chain kit company. It's not a true company, as I don't sell anything and no one buys anything. But nonetheless, I've made it look like a paper chain company. And here's the only product the company has:

Big Yay Paperchain Company is a company that sends out build-your-own paper chains. I personalize each package, with stickers and patterned papers for the event.


With each kit I offer an instruction sheet. It explains how to make a paper chain. It also provides details about how many links are provided (enough to fulfill the countdown), as well as the day the countdown should start. I print that sucker out on plain paper, add a lovely black cardstock backing, and then get creative with a whole punch. I loop ribbon through the punched holes to make it more decorative. I'm pretty sure I haven't looped the ribbon the same way twice.


When my friend was getting a (much needed) divorce and was counting down the days until it was final, I used girl's night out style paper. For my friend that was coming to visit, I used papers patterned with things about the area I live in. Another friend was counting down the days until her deployed husband came home, so I used Americana type paper. You get the idea.


For the themed paper links, I use 12" x 12" scrapbook paper. I get 13 1" wide strips out of the paper (each is 1" x 11"). You'll need to figure out the quantity, which can be difficult since time keeps on ticking while you're creating and while it's in the mail. This is why I usually provide a start date.


Package it all up with a little stapler. This makes the kit complete. Then mail it out.


I've only ever had good response from these. I don't ever tell the person it's in the mail. They know nothing about it until a random envelope shows up in their mailbox. And it's from some company called Big Yay! Paper Chain Company. Who wouldn't love that?!


Noon Year's Eve Party Invites

So, I love celebrating holidays with my boys. But I also love their bedtime. And that just doesn't kive with New year's Eve. Heck, I'll likely be in bed before midnight. So, i'm throwing a noon Year's Eve party for the under 10 crowd.

First step is always the invite, right? I saw this confetti cannon idea and just had to do it. So I did (and you'll see i'm showing all of you on my lovely worksurface that's been through hell and back. Feel free to ignore the lime green lines and whatnot. they're not a aprt of the invite)


First step was figuring out the party details. then making an invite on a long string of confetti. Confetti canons are about 1" in diameter, so you don't have a lot of room to work with. I used one side of the squares to write "It's a NOON Year's Eve Party" and the other side to provide details. We're starting the party at 10:30 so the kids can play, make a craft., eat lunch, and do the countdown (complete with balloon drop) at noon. Anywhoodles, make the invite.


Then empty the confetti cannons. Two ways you can do this. 1) take off the label and remove the "seal" at the top. Dump everything out. or 2) Release the cannon, shooting confetti and streamers in your house. then reset the cannon by pushing down real hard and twisting until the cylinder is locked again. Up to you.


Fill the cannons: fold your invite in. Add 1" discs of paper or pretty paper napkin (like I did) to separate the invite from the cylinder pusher thingy and the confetti. Fill as full as you wish.

Confetti!

Cover the cannon with a piece of paper cut larger than the top. Use another strip of paper/napkin to hold the cover on. Tape the edge of the strip down, but not the paper (just like how the cannon was assembled when you bought it).

Cover the outside with paper/napkin. The napkin had the colors I wanted, so it was an easy solution.


Add a strip of paper at the bottom (made on your home computer) that says "Twist Me" and then has a directional arrow. My graphics abilities are limited to MS Word, and even I can do this. you can too!

Tape it on.


Hand out the invitations. See your invited guests' faces light up.


I've passed out a few of these already (the party's Saturday, afterall), and everyone has loved the invitation! So easy and festive.

December 11, 2011

Snow Writing

We live where it snows. And being stuck inside sucks. So, we have to get creative.

a ketchup squirter, 1/4 C of rubbing alcohol, food coloring, and water make it more fun.
The more food coloring, the deeper the colors. The pic below was taken hours after the boys played outside. The color's still there. Too fun!